This article will provide you with a comprehensive walkthrough on how to create a store on Lumi Business. Follow the provided steps below to effortlessly create a store that enhances your organization and elevates the shopping experience for your customers.
Step 1
Begin by accessing your dashboard. From the list of menu options, select ‘INVENTORY.’ You can refer to the image below for visual guidance.
Step 2
Once you’ve clicked on the ‘INVENTORY’ button, you’ll notice two sub-buttons: ‘SELL’ and ‘MANAGE.’ To proceed, click on the ‘MANAGE’ button, as depicted in the image below.
Step 3
At the upper section of your current page, locate and click on ‘STORE,’ then proceed to select the ‘ADD NEW STORE’ button. This process is clearly illustrated in the accompanying image.
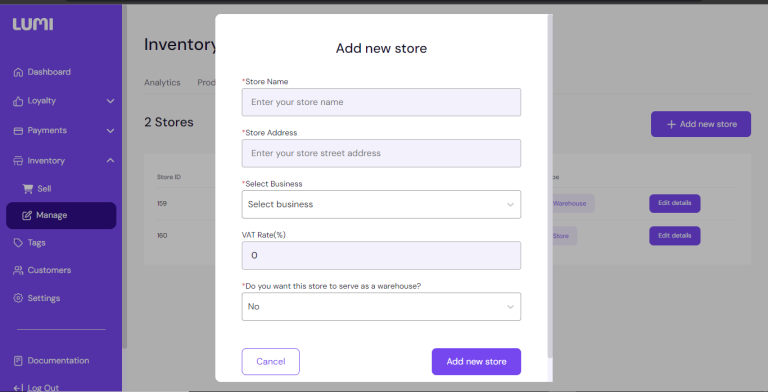
Step 4
Complete the necessary store details, which include Store Name, Address, Business Type, and VAT Rate. Following this, opt for your preferred store type: Regular Store or Warehouse. After providing all the mandatory information, click on ‘ADD NEW STORE.’ This action will finalize the creation of your new store.
Visual Guide
For a visual walkthrough, you can refer to the instructional video linked below. Video Link
If you encounter any challenges or require further guidance during this process, don’t hesitate to reach out to our dedicated support team at customerservice@enlumidata.com. We’re here to assist you every step of the way.